Every creator starts with a camera and a dream, but there comes a time to improve your content’s quality. For creators who shoot video on the go, be it for YouTube, TikTok, Instagram, or beyond, one of the biggest jumps you can make is a stabilizer or gimbal. These tools keep your camera stable while you move and shoot, reducing shaking.
You’ll notice a difference, whether making walk-and-talk TikToks or shooting interviews to go on a DSLR. Gimbals offer cinematic quality tracking and keep your content looking smooth and professional, no matter where you shoot. Gimbals and stabilizers also come in a wide range of prices and types. Before you shoot another shaky video, here are the best gimbals and stabilizers for every kind of creator.
What is the difference between a gimbal and a stabilizer?
Using a gimbal and stabilizer can help you create smoother videos than a hand-held setup, but they’re very different.
A gimbal features three rotating axes (pitch, roll, and yaw) that move to keep your camera image level. Each axes moves on its own, working together to stabilize your footage. Gimbals have three axes, power sources, and moving parts, making them more complicated than traditional stabilizers.
On the other hand, the traditional stabilizer is a mount designed to compensate for unwanted camera movement. These stabilizers don’t feature moving parts. Instead, your camera or smartphone is balanced and attached to a cage or mount. When properly balanced, you can comfortably hold the camera while moving without a shaky grip.
Each has its benefits. Gimbals are much more potent than stabilizers. Gimbals are also expensive and require power. Meanwhile, a traditional stabilizer cage is inexpensive and never runs out of power. However, if you’re shooting action and need to move quickly, your footage won’t have the smoothness that comes with a gimbal.
That doesn’t mean you can’t shoot action with a stabilizer. Just ask your favorite local skateboarder how much mileage someone can get out of a simple stabilizer and a DSLR.
How to Choose the Best Gimbal or Stabilizer
When choosing the right gimbal or stabilizer for your content creation needs, it’s essential to consider several key factors to ensure you get the most value and performance out of your investment. First, assess your budget and look for a product that offers the best balance between cost and quality. High-end gimbals may offer advanced features such as better stabilization and additional modes, but there are also mid-range options that provide excellent value without breaking the bank.
Next, consider the functionality you need based on the type of content you produce. If your work involves a lot of movement, look for a gimbal with strong stabilization capabilities and responsiveness. On the other hand, if you’re into vlogging or more stationary shots, a simpler stabilizer might suffice. Lastly, think about your setup, including the weight and size of your camera gear. Ensure the gimbal you choose can comfortably support your camera and any additional accessories you might use, such as microphones or lights.
By carefully evaluating these aspects, you can select a gimbal or stabilizer that enhances your content creation, offering smooth, professional-looking footage that captivates your audience.
The Best Gimbal For Creators Of Any Kind
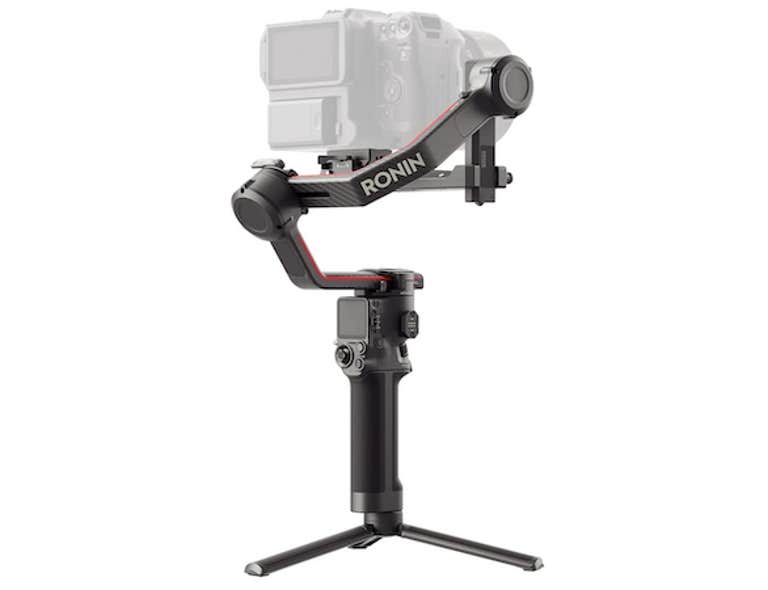
Best Gimble for DSLR Cameras: DJI RS3 Pro
PRICE: $869
For the vast majority of creators, this is probably entirely too much gimbal. The RS3 weighs three pounds and costs almost $900. If you’re shooting on a smartphone, this is overkill. However, this monster will cover all the needs of creators who shoot on a DSLR or mirrorless cameras that use heavy glass. It supports up to 10 lbs of weight, making it ideal for filmmakers looking to utilize a range of glass.
When you want the smoothest video from your heavy gear, the DJI RS3 Pro is hard to beat. This is a high-end gimbal experience for professional filmmakers and creators. The extended carbon fiber axis arms are made of uncut carbon fiber, delivering incredible stiffness while reducing weight.
Utilizing a multipoint LiDAR focusing system, the RS3 maintains focus and tracks your subject while you maneuver the camera. It can even pair DJI’s focus motor system to turn your manual lens into an autofocus lens. The LiDAR range finder boasts 43,200 ranging points for focusing detection and precise focus within 14 meters. That’s up to 45.9 feet away.
Thanks to its replaceable batteries, you’ll never run out of power on the go. Finally, it features extensive ports for DJI RS SDK protocol allowing it to connect to vehicle mounts, steadicams, and more. At $869, this is way more gimbal than most creators will ever need. But if you’re building the next Dude Perfect, this beast will have your back.
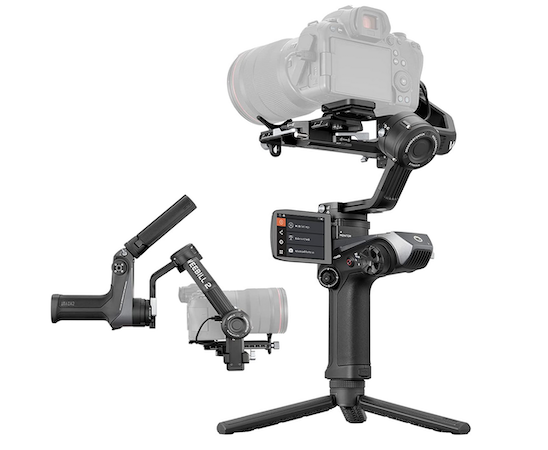
Best Budget Gimble for DSLR and Mirrorless Cameras: Zhiyun Weebill 2
PRICE: $299
Do not let the word budget sway you; the Weebill 2 is an incredibly powerful gimbal for DSLR and mirrorless creators. Yes, the Weebill 3 is out on the market. But, given the incredible power of the Weebill 2, and its dropping price, this unit is a steal. We adore everything about this unit, from its robust stabilization to its integrated 2.88” color touch screen.
The touch screen lets you monitor your footage while adjusting settings on the fly. Activate time-lapse, adjust angles, and more without touching your camera or using the Weebill app. The Weebill provides buttery smooth stabilization even in busy settings thanks to a two-filter interruption vector-splitting sensor.
With a 9-hour rechargeable battery, the Weebill 2 can outlast even extended shoots on the go. Then it recharges in as little as 1.6 hours. It features an incredible sling grip, providing comfortable and stable operation, even when shooting at low angles. The star is the customizable focus wheel, which delivers many options. Set it for roll axis control, aperture, ISO, electronic focus, or focus motor adjustment, and let your creativity flow.
If you’re looking for what gimbal is easiest to use, the Weebill 2 shines. Zhiyun has a wide range of online video tutorials to explain the system. They even explain balancing your camera. These tutorials make the Weebill 2 the easiest pro gimbal to balance for beginners. There are even connection guides for every significant DSLR camera system.
This unit is highly recommended when stepping up your gimbal game or just getting started.
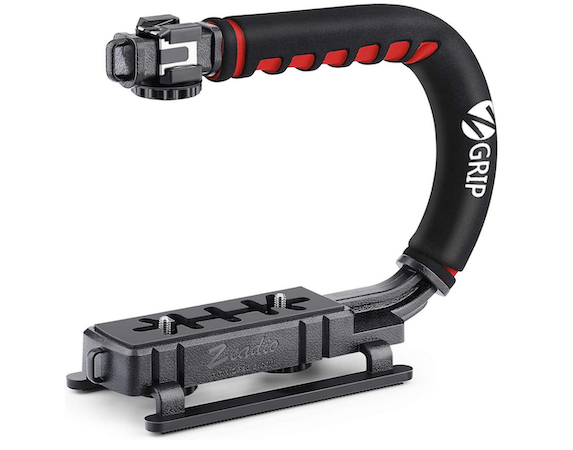
Best Budget Camera Stabilizer for Content Creators: Zeadio Video Action Stabilizing Grip
PRICE: $18.99
Everyone needs to start somewhere, and the Zeadio Stabilizing Handle is a great start whether you’re shooting on DSLR, mirrorless camera, or a smartphone. This simple design allows you to use the weight of the mounted camera to center your grip from the top handle. From personal experience, this is one of the easiest stabilizers for beginners to learn on. It can be ready to shoot any project in just a few minutes.
This modular grip handle boasts multiple cold-shoe mounts and universal screws. That makes it simple to add lights, microphones, cameras, batteries, or other tools that inspire you. You can go wild with add-ons, thanks to support for up to 13 pounds of weight.
You should remember this is a manual weighted stabilizer, so it will not provide the same smoothness as a gimbal. But it’s under $20. At that price point, anyone can learn the basics and decide if they’re ready for a more expensive option.
Best Smartphone Gimbal: DJI Osmo Mobile 6
Price: $149
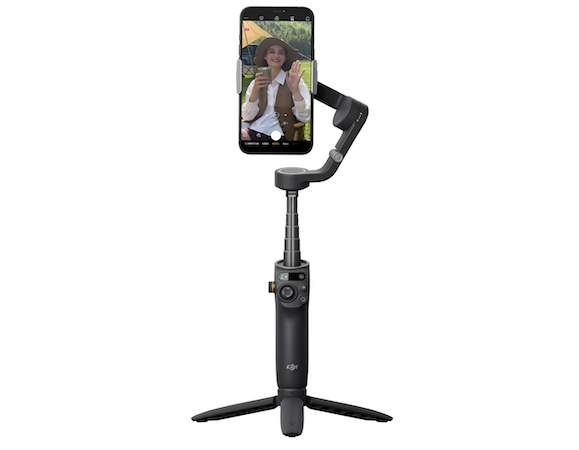
The world is full of smartphone selfie sticks, but the DJI Osmo Mobile 6 is a magic wand for content creators. When you need the smoothest gimbal for smartphone videos, the DJI Osmo Mobile 6 is hard to beat. This premium product is designed with creators in mind, from its portability to tracking functions and six-hour battery.
Using ActiveTrack 6.0, the OM 6 can follow even the most energetic subjects, from dancing kids to running animals. Weighing just .68 pounds, this gimbal is perfect for creators who want to travel light. The included OM Magnetic Phone Clamp 3 lets you quickly attach your smartphone when the moment comes. Best of all, its side wheel offers cinematic effects from the handle. Zoom in, adjust focus, and more without grabbing your phone.
DJI is known for quality, and you’ll notice with every use. At $149, this isn’t a wildly cheap unit. However, you’ll feel every dollar you spend in the smooth interface and easy-to-use design.
Best Budget Smartphone Gimble: Zhiyun Smooth Q4 Gimbal Stabilizer
PRICE: $89
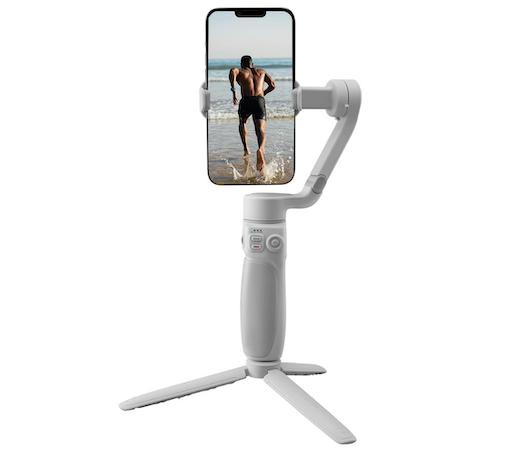
In a battle to the death, the Osmo Mobile 6 and the Smooth Q4 come incredibly close regarding the stats. The Smooth Q4 boasts twice as much battery life as the Osmo unit. You can get between 12 and 15 hours of use without charging, making this the ideal unit when power matters most.
It extends the same distance and has handy controls available on the handle. The Smooth Q4 offers features like a dolly zoom and SmartFollow 3.0 tracking. So why the price difference? First, the Smooth Q5 is in stores, so this is now on sale. But there are a few other minor differences. The Smooth Q4 holds your phone, while the OM 6 has a magnetic plate. Each features powerful smart tracking, but the OM 6’s tracking is slightly better.
Of course, the OM 6’s better tracking comes with considerably less battery life. There are trade-offs with each device. If money is no object, we suggest getting the OM 6 to get the best tracking you can find on a smartphone gimbal. But if every dollar counts, the Smooth Q4 is a wonderful workhorse that will do you proud. You can’t go wrong either way.
10 Gimbal and Stabilizer Tips
Here are some tips to get the most out of your gimbal or stabilizer:
- Balance Your Camera Properly: Before you start shooting, ensure your camera is well-balanced on the gimbal. An unbalanced setup can cause the motors to work harder than necessary, potentially leading to shaky footage and reduced battery life.
- Master the Basics: Spend time practicing with your gimbal to get comfortable with its basic functions. Learn how to switch between different modes, such as pan-follow, lock, and the full-follow mode. Understanding these will allow you to create a variety of shots.
- Use Smooth Movements: Gimbals excel in smoothing out your movements, but they can’t entirely compensate for sudden jolts or aggressive steps. Move slowly and deliberately, especially when panning or tilting, to achieve the best results.
- Experiment with Angles and Positions: Gimbals allow for creativity in your shots that would be hard to achieve otherwise. Try low-angle shots, crane-like overhead shots, or even mimic slider shots by moving your gimbal horizontally. These can add a dynamic element to your videos.
- Walk Properly: The “ninja walk” or “gimbal walk” — bending your knees slightly and rolling from heel to toe as you step — can greatly reduce up-and-down shaking, making your footage smoother.
- Utilize the Joystick: If your gimbal has a joystick, use it for precise control over your camera’s movement. This is particularly useful for fine-tuning your composition or creating slow, controlled pans.
- Keep It Charged and Updated: Make sure your gimbal’s firmware is up to date, and keep your batteries charged. Nothing halts a shoot faster than having to wait for batteries to charge or dealing with technical issues due to outdated firmware.
- Practice Transitions: Smooth transitions between shots can significantly enhance your video’s quality. Practice moving from one shot to another fluidly, such as from a wide scene to focusing on a specific subject, to make your videos more engaging.
- Incorporate External Monitors: If your gimbal supports it, using an external monitor can help you better frame your shots and ensure focus, especially on sunny days when it’s hard to see the camera’s built-in screen.
- Learn from Others: Watch tutorials and learn from experienced gimbal users. There’s a wealth of knowledge available online that can provide new techniques and creative ideas for using your gimbal more effectively.
This article will be updated over time. Do you have a gimbal you’d like us to test and review? Contact Passion Fruit; we’re always looking to cover the best new tech for creators.


