The first YouTube video is just a guy standing at the zoo. It’s 19 seconds long, and shot with a digital camera from 18 years ago. Since the beginning of YouTube, lighting for YouTube creators was less important than the fact that you were making something. But that doesn’t mean you can’t make the most out of your videos with better lighting.
The right light and learning how to position it can give your video professional authority and an extra level of character. For horror creators, good lighting can make your living room a graveyard, while reactors can turn a home office into a makeshift TV studio. Your content stands on its own, but lighting is the seasoning that can turn a great recipe into an unforgettable meal.
Are you ready to take your lighting to another level? Here’s how to get the best lighting for YouTube videos.
Getting the Best Video Lighting for YouTube Videos
The most important thing to know about adding lighting to your video creation setup is testing. Every room is a little different, with corners, bright spots, windows, and walls. Light moves and reflects; that’s part of the fun of working with it.
If the first lighting technique you try doesn’t work, take a reference video. Then write down the settings and angles you used! This will help you in the future to troubleshoot what isn’t working. It will also give you an idea of things to try when you get more lights. Maybe the lighting setup that didn’t work with one ring light is actually perfect once you add a background light.
Finally, remember you don’t need to buy everything at once. Lighting is stackable; that means as you get better lights, your older lights can still be used to enhance your video. Your ring light which was once your main forward light, can now be your keylight. Or a background fill light.
Basics of Lighting for YouTube
First, look at the light that already exists in your room. Take note of overhead lighting, lamps, and natural light sources like windows or skylights. Make sure the strongest light in your room is behind the camera and in front of you. That means if you have a large bedroom window with light pouring into your room, face the window and put the camera there. In an ideal world, your strongest light will be behind your camera and slightly above it.
Make sure there aren’t strong lights directly behind you in the frame. They can wash out your image. That doesn’t mean you have to get rid of any lights behind you! Just make sure they’ve got a dimmer bulb or any adjustable level. This way you can create contrast in your videos.
We’ve selected lights for this list that emulate a two-point lighting setup. This means you have lights coming in from two separate angles to completely illuminate your face. If you’re using two panels, make sure one of them is slightly brighter than the other. This can provide contrast and depth, creating a more professional-looking image.
Sadly ring lights don’t allow you to make one side brighter than the other. However, they provide the best lighting and contract when you’re just using one light. They also can be used as key lighting or background fill lighting in the future when you start with three-point lighting.
A Quick Word About Three-Point Lighting
These are the best lights to get you started on your video journey. As you expand your operations, you can invest in more lighting to take your content to the next level. Many of your favorite creators use three-point lighting to make their videos pop. Three-point lighting lets you create depth, draw attention to details, and make your video look more professional.
If you’d like to learn more about we’ve put together a three-point lighting tutorial to get you started. Even when you only have one of two lights, we suggest reading this article. It will help you understand some basics of light theory, so you can get better results with what you already have.
4 Top Starter Setups for Lighting YouTube Video
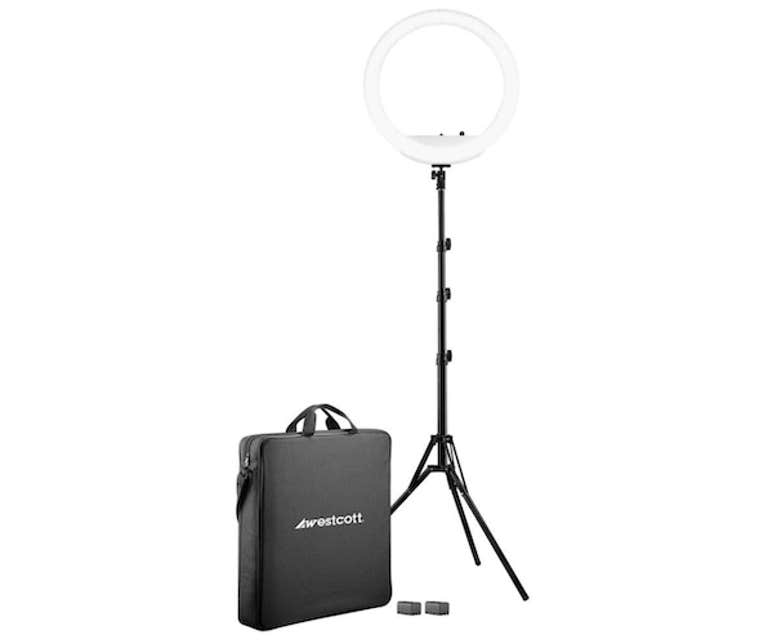
1) Westcott 18-inch Bi-Color LED Ring Light Kit with Batteries & Stand
Price: $179.90
If you’re only going to buy one light, make sure you get a great one. The Westcot 18-inch bi-color LED is a battery-powered workhorse that provides studio-quality light in a mighty circular package. Delivering a color temperature range from 3200K (tungsten) to 5600K (daylight), you can find the perfect light to match any environment that comes your way.
With a 97 CRI color accuracy score, the Westcott light helps you discover flattering skin tones even in harsh conditions. Free from flickering, this light is designed to quickly set up and start creating without tons of troubleshooting. Its handy battery level indicator and power/color temperature dials make adjustments and planning your shoot equally easy.
It even comes with multiple mounting options for cameras and smartphones. This kit has everything from a cold shoe mount to a flexible gooseneck holder, a 6.5’ stand, two batteries, an AC adapter, and a travel case. That’s everything you need to start shooting great-looking front-facing video.
2) Neewr 700W Photography Softbox Lighting Kit
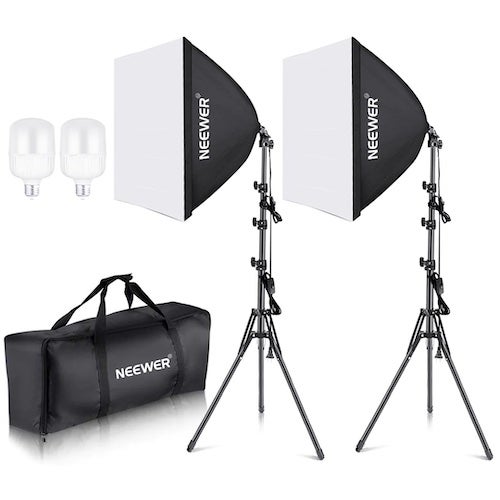
Price: $129.99
Neewer is the first home of most videographers and photographers. Their affordable and powerful lighting kits have been laying the foundation for creators for years. Products like the 24” x 24” photography softbox kit are why. With two stands, two lights, two soft boxes, and a carrying case, this kit has your studio ready for just $129.99.
This is the perfect setup for learning two-point lighting, setting a keylight, and creating background fill without blowing up your budget. Each of the 24”x24” lights has a diffuser panel for advancing and softening light.
The only real downside is the need to manually put together each softbox when you shoot unless you want them taking up space. Additionally, some people may find the lack of battery power frustrating. Neewr’s kit might be basic, but it’s incredibly powerful, delivering 3450 lumens of incredible light.
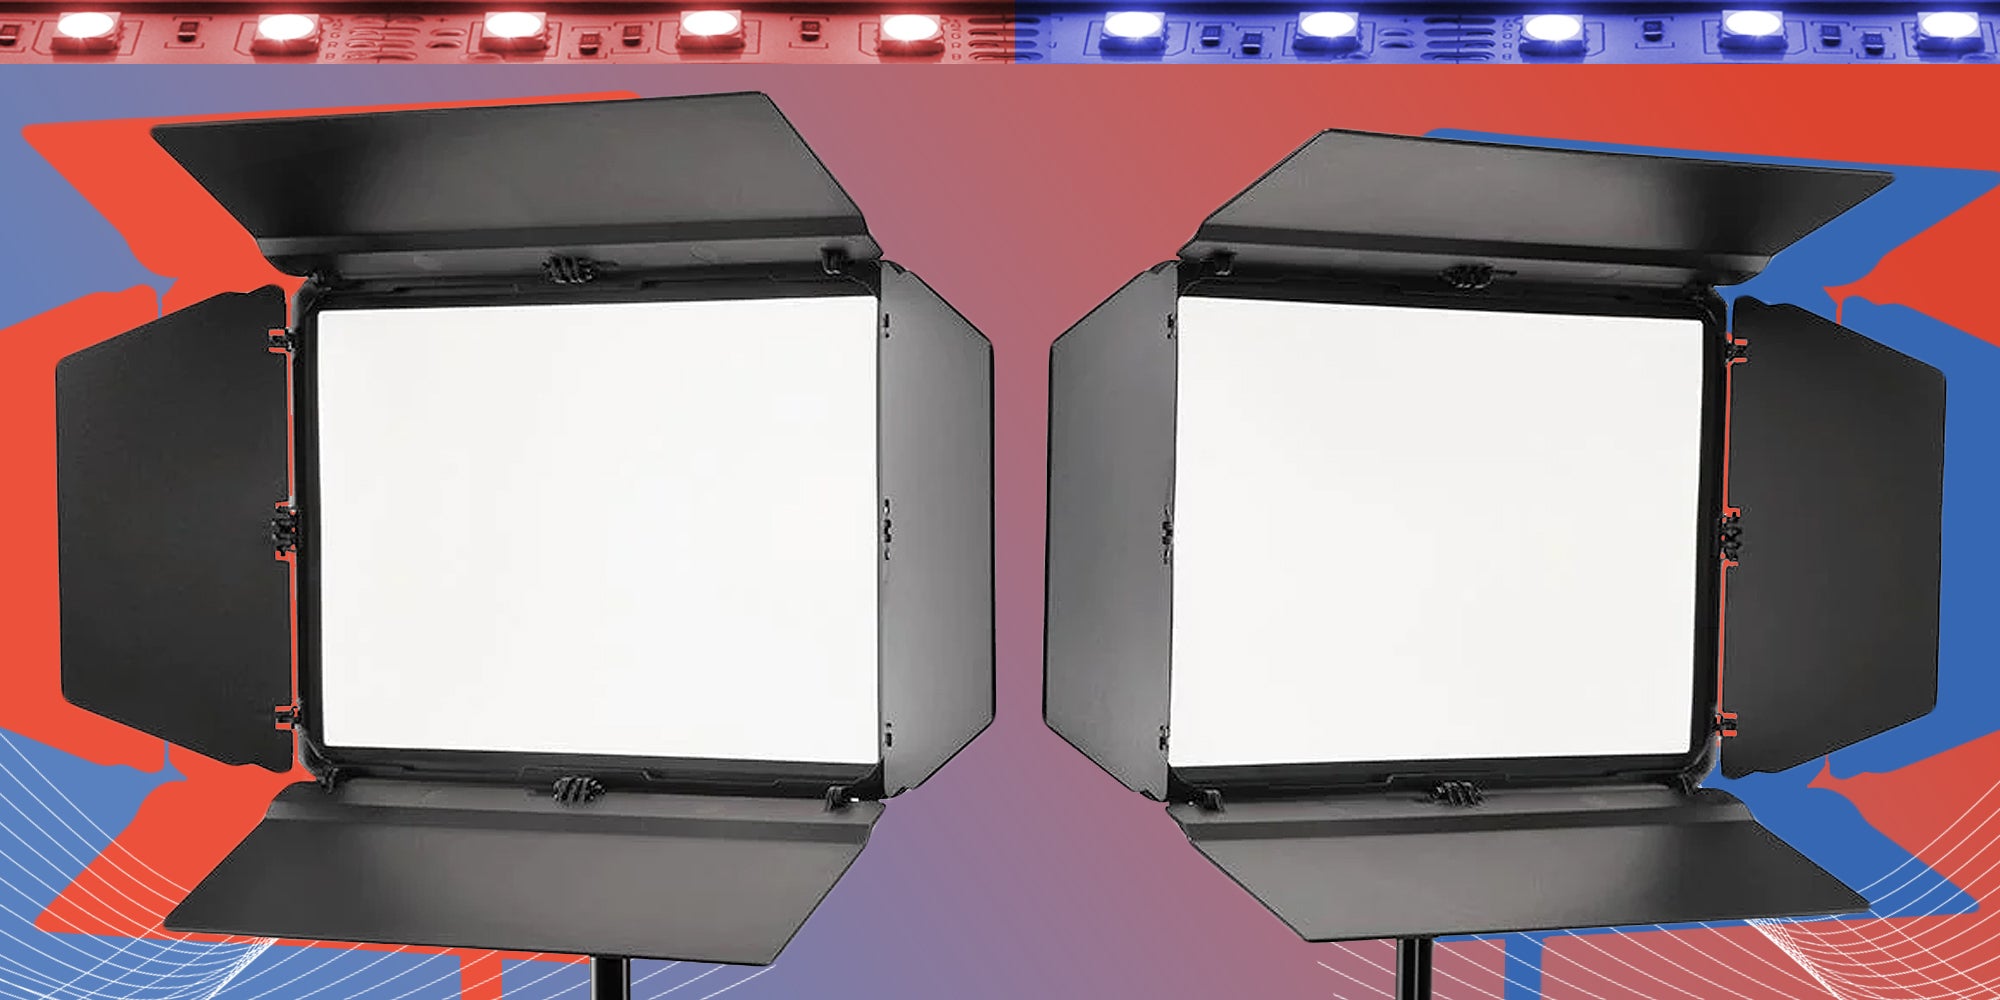
3) Lume Cube Studio Panel Lighting Kit
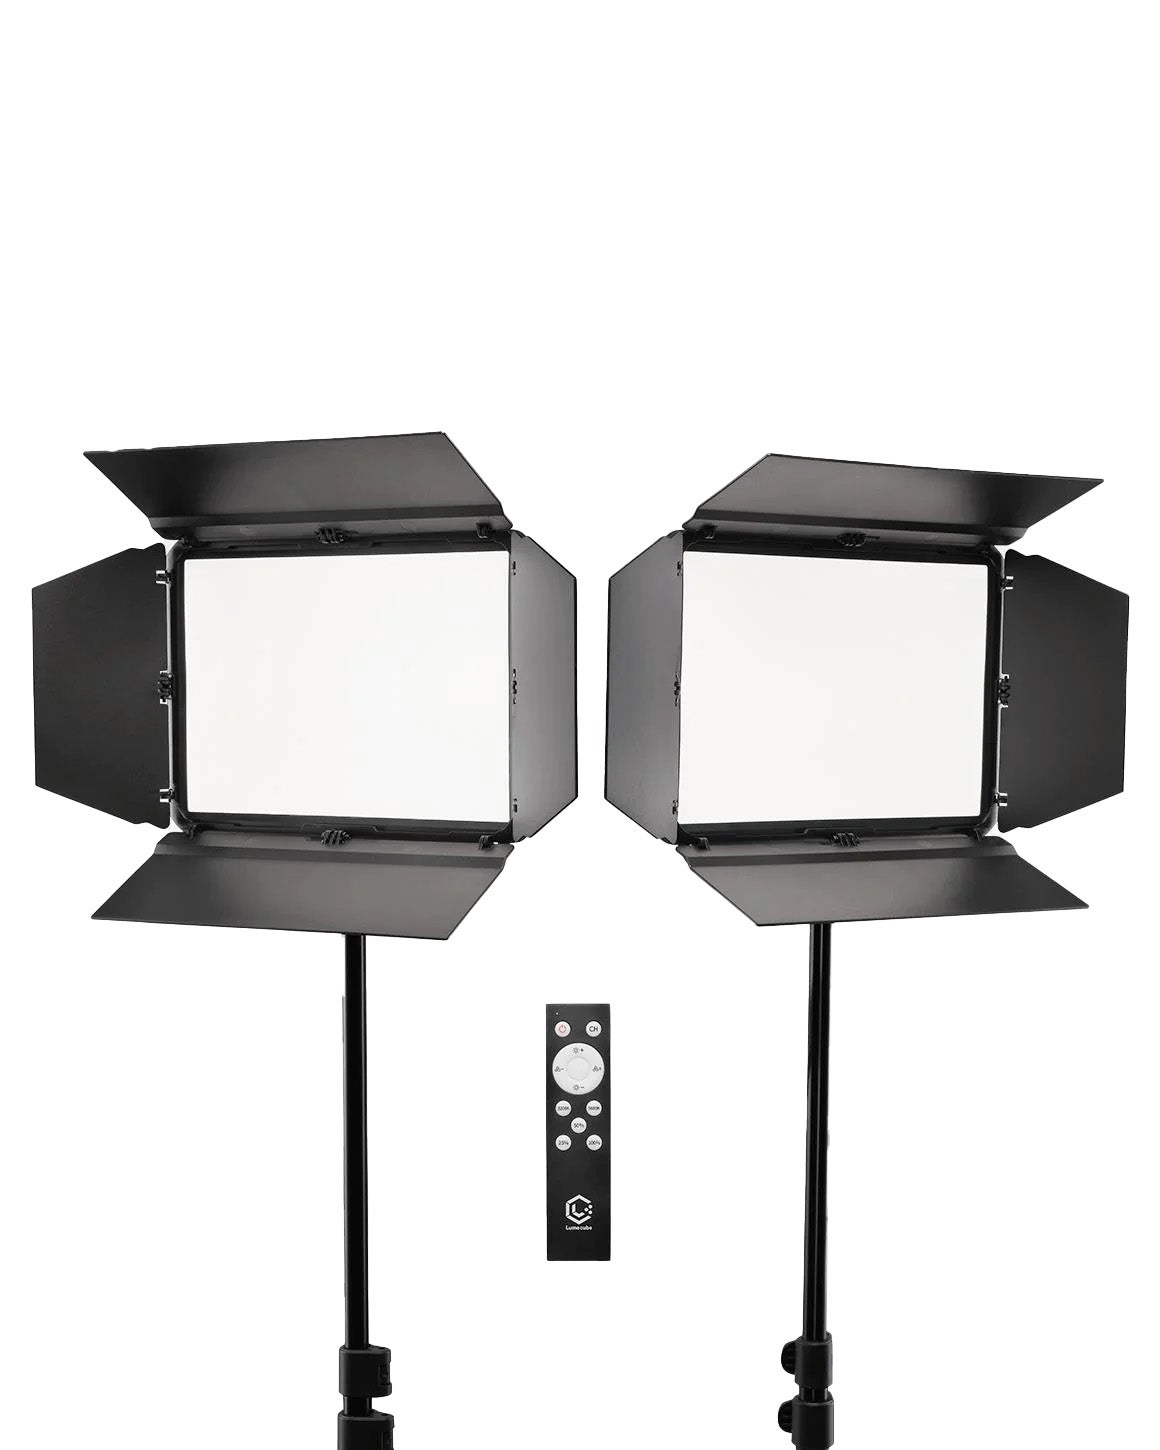
Price: $349.99
On the other end of the Neewr softbox kit is Lume Cube’s Studio Panel Lighting Kit. Lume Cube’s kit is smaller, lighter, and less powerful. However, due to its size, you can position these lights closer to your subject without worrying about cables or blinding them. Where these lights really shine, pun intended, is Lume Cube’s Edge Lit Technology. Utilizing 200 inward-facing LEDs the Studio Panel has built-diffusion that gives you soft, yet powerful, light evenly on your subject.
It has the same color temperature range of 3200K (tungsten) to 5600K (daylight) as the Westcott ring light. However, thanks to being a two-panel system, you have a much wider range of lighting options available to you. Creating dynamic lighting levels is simple and fun, even when you’re solo shooting. That’s because this system includes a remote control for setting power levels and adjusting color temperature.
You can run the Studio Panel kit off batteries for 80 minutes at full power, or plug it into the wall for longer shoots. Each kit also includes two 70” stands that adjust from 18” to 70”, then break down to just 18” for easy storing. You can fit two panels, two stands, and power cords, and still have room for gels in its padded carrying case.
They even throw in barn doors to help you focus and shape the light to your whims. Yes, $349.99 is a lot of money. But this kit is worth every dollar, especially for solo creators with smaller living situations.
4) Apexel 10-inch LED Ring Light
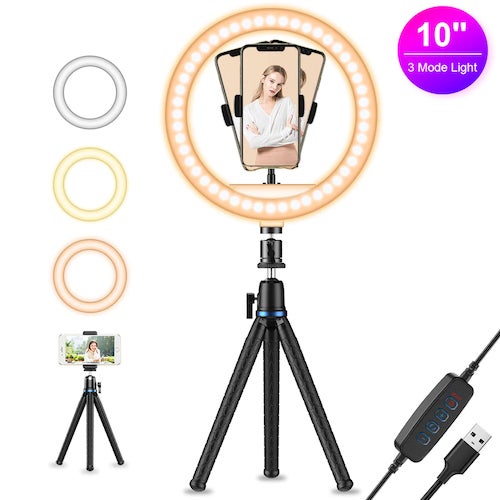
Price: $45.99
OK, maybe the premium options above have given you sticker shock. We get it. Don’t worry, great lighting for your YouTube videos can be had on a budget. Apexel’s 10” LED ring light gives you powerful light, a flexible tripod, and a phone holder for just $45.99. While it lacks the specific color temperature ranges of other lights, Apexel delivers three light modes: white, cold white, and warm.
Additionally, there are 11 adjustable brightness levels for you to choose from. That’s 33 possible lighting options for less than $50. And with 120 LEDs, this little wonder gets incredibly bright. It’s also USB-powered, meaning you can plug it into any wall adapter, power bank, computer, or speaker with a USB port.
You don’t even need a smartphone to use it, thanks to the included hot shoe mount and ball mount. At just 10” and $45.99, the Apexel LED ring light won’t break the bank or take up too much space in your house. And when you finally upgrade to a bigger or better light, you’ll still have a powerful fill light to round out your setup. Remember, creativity and drive are more important than expensive gear.